Re: A Return to M 31
Posted: Sat Nov 20, 2021 9:22 pm
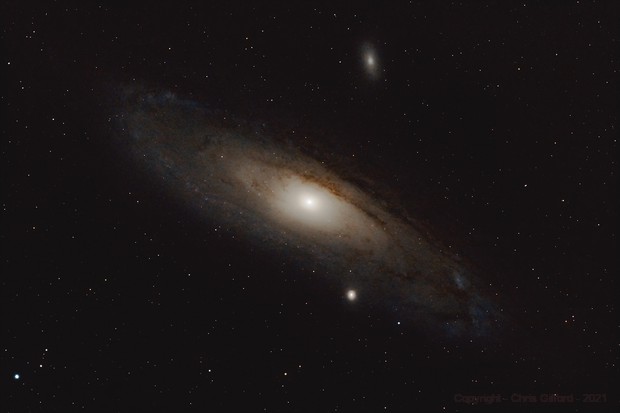
@Jockinireland , your work flow is totally awesome! I redid the noise removal then used your technique on the outer edges in the upper left, lower right corners and along some of the inner dust lanes. I brightened the core a little bit too get some more detail out of it. I think I'm happy this version. Want to thank @SkyHiker too, he initially pointed out that the core was blown out and the area around the core was mostly grey. This was a truly good exercise in processing.
Now back to the Seven Sisters for a redo. That one is definitely an HDR project!
Clear Skies!
Now back to the Seven Sisters for a redo. That one is definitely an HDR project!
Clear Skies!