Page 1 of 3
Mike's Low-Budget Home Observatory (WIP)
Posted: Mon May 31, 2021 1:15 am
by chartram
Hello everyone!
I am SUPER excited to finally be in the beginning stages of my low-budget, low-tech DIY roll-off! Hopefully, documenting my progress here will help someone out and maybe highlight that a small DIY backyard observatory does not have to come with a high price tag. I will also document the cost as this progresses.
In order to keep the cost down, I went with a resin shed since lumber prices are astronomical (pun intended) these days.
Before I ramble any further, I'd like to thank a gentleman named Bill from the Astronomical Society of Eastern Missouri. He provided me with a SOLID framework of how he built his, including a very detailed, 30pg document with pictures that goes through every step of the process... even some lessons learned and tips and tricks! Thank you Bill!
The shed I will be using is a Craftsman 7x7 resin shed on an 8x8 deck. Since my wife and I will be selling this house in 2 to 4 years, I wanted something simple but effective that could be easily removed from the property, and not break the bank. This will give me somewhere to stay pretty much permanently set up, and ready to go whenever the sky permits. Not even doing a cement pier, will just use the tripod to keep things simple.
Here is the resin shed:

It will be fully framed on the inside prior to making the roof cut, so that the outer structure becomes nothing more than a 'skin'. The roll-off system will be as simple as it gets, with eight 2" fixed caster wheels that cost about 4 bucks apiece at the local hardware store, or 7 bucks apiece on Amazon. The shed empty weighs about 360lbs. Not sure what the deck weighs, but it'll be pretty heavy when assembled. We will also anchor the deck to the ground since we get the occasional microburst here in central Georgia.
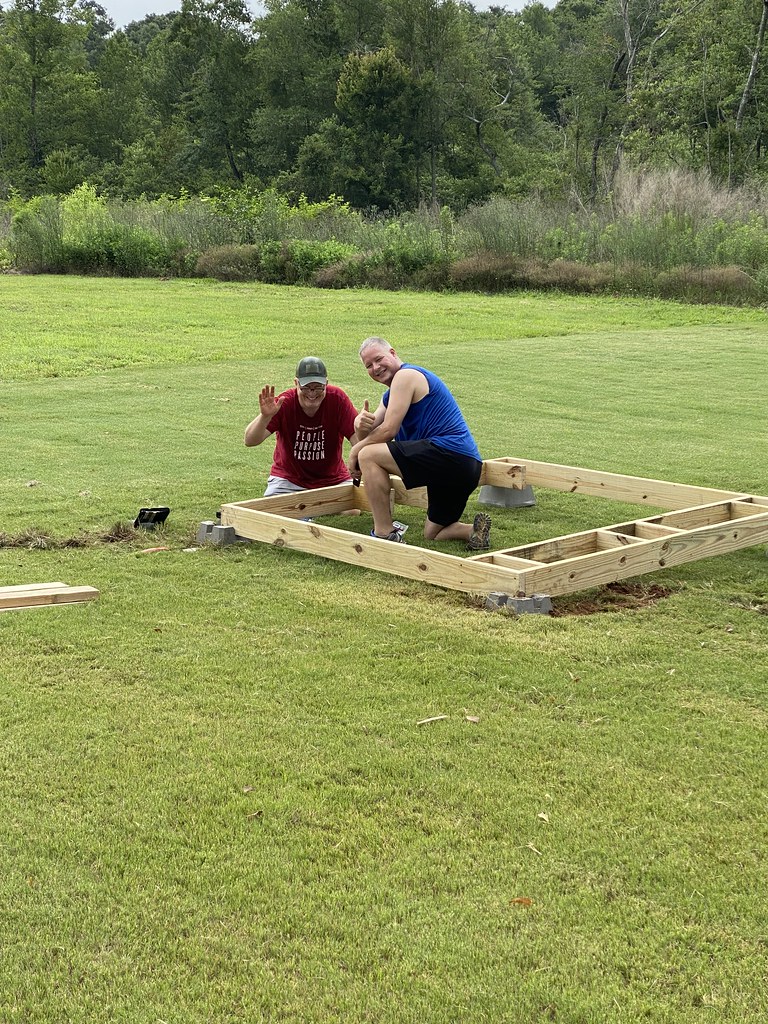
Here is a pic of me trying to build something:

Needless to say, I have a friend who knows what he is doing coming out to help with the woodworking! By "help" I mean do exactly what he tells me to do and not deviate LOL
So far, I have the shed and everything needed to build the deck. Another key point is to tear up as little of the back grass as possible, so a simple wooden deck on deck stones is the way I chose to go.

The 8x8 deck will be made with 2x6" framing, with 2 sheets of 4x8' OSB as the platform (floor of the shed and all of the lower framing will be screwed to the platform). The 4x4"s in the picture are for the gantry, which will have 'feet' sitting on 12"x12' paving stones. All of the wood is pressure treated, but I will still need to seal the OSB.
I will purchase the 2x4's, wheels and odds/ends after the shed is built and we get some measurements.
So far total cost (shed, deck wood, 4x4's, deck stones and wood screws) is at $1,073.00...
More to come!
Mike
Re: Mike's Low-Budget Home Observatory (WIP)
Posted: Mon May 31, 2021 1:38 am
by Ylem
I will be following this closely Mike.
I put up a resin shed 2 months ago, with the final intent to make it an Observatory

Re: Mike's Low-Budget Home Observatory (WIP)
Posted: Mon May 31, 2021 4:50 am
by Lady Fraktor
I hope the build goes quickly and you get a lot of use from it
Re: Mike's Low-Budget Home Observatory (WIP)
Posted: Mon May 31, 2021 5:34 am
by notFritzArgelander
Envy..... Good for you!
Re: Mike's Low-Budget Home Observatory (WIP)
Posted: Mon May 31, 2021 6:40 pm
by Michael131313
Best of luck . Looks good.

Re: Mike's Low-Budget Home Observatory (WIP)
Posted: Wed Jun 02, 2021 6:31 am
by Gulf Coast Guy
Resin? Huh? Must be nice. My HOA nixed Resin without so much as a second thought. I'll be watching,too
Re: Mike's Low-Budget Home Observatory (WIP)
Posted: Wed Jun 02, 2021 6:38 am
by Unitron48
Best wishes for a successful project. Looking forward to tracking your progress.
Dave
Re: Mike's Low-Budget Home Observatory (WIP)
Posted: Wed Jun 02, 2021 1:30 pm
by pakarinen
My HOA doesn't allow any kind of outbuilding so I have to live vicariously through those who can build obsies. I'll be following your progress with interest.
Sidenote - Have you consider a cement block pier? Aside from the footing, you could take it down with a sledge hammer before you move.
Re: Mike's Low-Budget Home Observatory (WIP)
Posted: Wed Jun 02, 2021 5:57 pm
by Chich
Good on you
Please keep us up to date on your progress. And yes, I'm a Patrick when it comes to building things at times as well
Re: Mike's Low-Budget Home Observatory (WIP)
Posted: Wed Jun 02, 2021 8:44 pm
by SkyHiker
Thanks for starting this thread. Now I'm tempted to put a 7x7 shed on my driveway as well. Maybe camouflage it by a fake wheel and fender attachment to the side so it looks like a trailer? A coupler at the front for extra realism? I may have to pay a visit to the junk yard. The G11 HD tripod on pavers is as solid as a pier so that's one thing I don't need, fortunately.
Re: Mike's Low-Budget Home Observatory (WIP)
Posted: Wed Jun 02, 2021 11:07 pm
by chartram
Thanks all for the encouragement!
I asked the HOA manager before we closed if I could put some kind of removable obsy in. He said yes, that was 2 years ago, so too late if they have a problem with it LOL! Our house is on the edge of the neighborhood with no houses behind us, some kind of protected creek area that’ll never be developed.
A pier crossed my mind, but the tripod will suffice for now. Knocking a cement pier down with a sledge hammer sounds like too much work for a temporary structure. Trying to keep it as simple and removable as possible. Plus no hole in the floor. Our next house will have a better obsy, this one just to tide me over until then.
Hope to get the deck & shed built this weekend or next- more to come!
Mike
Re: Mike's Low-Budget Home Observatory (WIP)
Posted: Sun Jun 06, 2021 6:54 pm
by chartram
Got some supplies today from the local home improvement store. Picked up four 2" fixed casters and the stuff needed to stain/seal the OSB.


Although small, these casters can handle up to 125lbs each.
Also ordered the casters and track for the other side, should be here around June 15th.


Having one side's casters on a v-track seems the easiest way to keep both sides aligned.
My buddy and I just compared busy schedules- It looks like we will build the deck on the 19th.
Today's expenditure: $219.00
Total cost so far: $1,292.00
Mike
Re: Mike's Low-Budget Home Observatory (WIP)
Posted: Mon Jun 14, 2021 3:39 pm
by chartram
Amazon got me for $60 lol. Ordered lag bolts and washers to screw the shed to the deck, and a wireless thermometer/hygrometer for monitoring conditions inside.
Also completed the pre-assembly stuff to save time on build day. Plan is still to build the deck this coming Saturday.
Total cost so far: $1,352.00
Re: Mike's Low-Budget Home Observatory (WIP)
Posted: Sun Jun 20, 2021 3:36 pm
by chartram
Built the deck yesterday between rains.

Although I am not much of a builder, the deck build was pretty straightforward... with all measurements etc. given in the Craftsman shed instruction manual. Thank goodness for my pal Wendell. Would be lost on this without his help!
Leveling it was the tedious part, but was not that bad with the deck stones and a couple of pavers. One does not realize how UN-level their yard is until they need something on it to be level

Exceptionally poor weather today, so took this time to do some weatherproofing. Each of the 4 roof panels has a skylight so I went around them with some GE UV-proof, waterproof, extreme temperature rated silicone caulking.

The caulk was $8.00 at the local hardware store.
Weather permitting, I will try to build the shed this week. If schedule does not allow, then most likely, the next update will be over 4th of July weekend.
Total cost so far: $1,360.00
Re: Mike's Low-Budget Home Observatory (WIP)
Posted: Wed Jun 23, 2021 4:10 pm
by Gulf Coast Guy
Looks like you're off to a good start.
Re: Mike's Low-Budget Home Observatory (WIP)
Posted: Sun Jul 11, 2021 7:55 pm
by chartram
Made some progress over the 4th of July weekend, just now getting time to update.
The shed is built and ready for framing/modification.


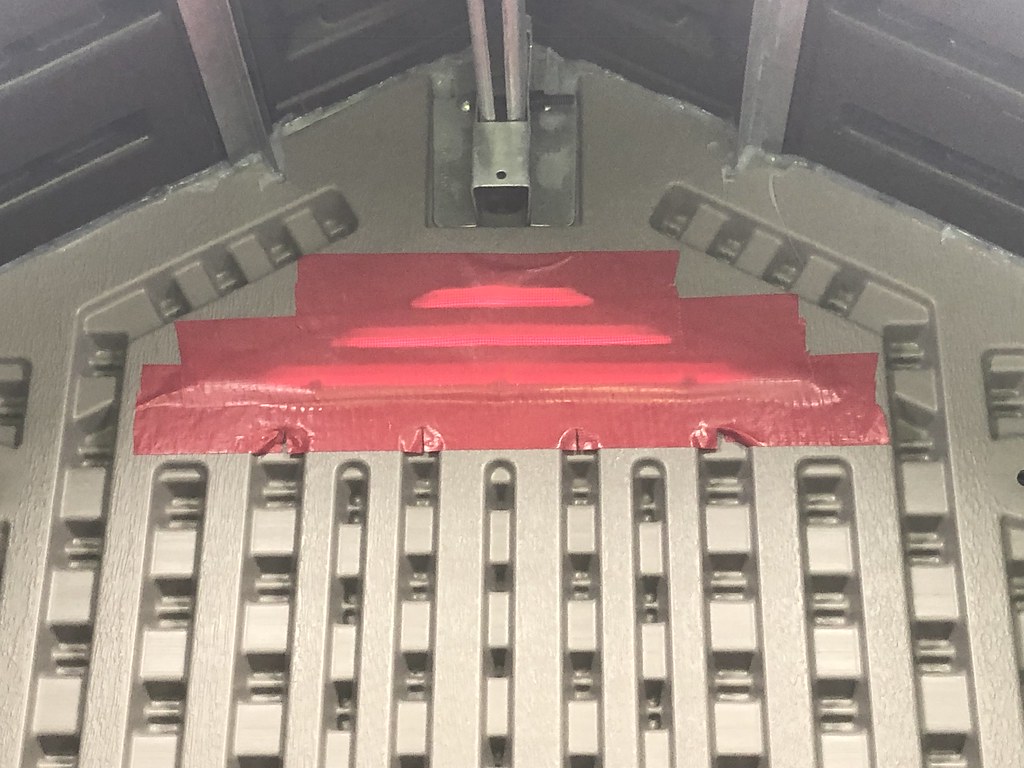
To test for leaks, I ran the sprinklers and noted several places where water found its way in. Also noted several places where it was pretty easy to see daylight coming in (corners, seams where roof & floors/walls meet etc.). The good news is that this was nothing that some more silicone sealant could not handle. After applying it everywhere I could think of inside and out, running the sprinklers and some very hard Georgia rains, it stays pretty much bone dry in there. The only exception is the immediate area at the doors, but this should not be a factor. Also used duct tape to cover the vent screens as they are pretty flimsy and would probably not do a very good job of keeping weather and critters out.


As previously mentioned, home improvement is not my forte, so please don't laugh too hard at my mad caulking skills
Luckily, this is all about function and I have not quit my day job
I got one of those cheap Amazon Temp/Hygrometers that transmits the temp/humidity inside the shed... The temperature inside the shed gets to be about 20-30 degrees above ambient in the heat of the day, which will need to be addressed. As an example, it is currently 81F outside, and the shed temperature is reading 110F. The camera is rated at 140F storage temperature, and I know the scope and mount would be fine... but I'd like to keep the shed at about 90-100 max during the day as well as keep the humidity inside below 90%. Assume that a portable AC/dehumidifier is in the future, if anything for peace of mind. Either that or will insulate the walls and also line the roof panels with Mylar once the framing is done. More to come on temp/humidity control. One nicety with the Craftsman shed is that it comes with a small sliding door to run an extension cord out to it... Very handy for a guy like me trying to keep it as simple as possible.
Structurally, it seems to be pretty sturdy as-is. We have a had a couple of pretty nasty storms in the last week. Even sitting right in the middle of the yard with no cover, it held up well and did not leak. No doubt that once the framing is complete, it will be even more stout, as well as bolted down to the platform in several more places.
As a side note, we measured and placed the platform runners and cross beams very meticulously. To my surprise, none of the screw points on the shed floor matched the runner locations on the instruction sheet provided. I mean, they were not even close enough to move the floor into position without one or more sides hanging off the platform. The way I fixed this was to use 3/8" toggle bolts to hold the floor down. I only mention this in case anyone decides to go the same route... and again, it is still held down very solidly and will be more so when the framing gets done.
Amazon thermometer/hygrometer: 20 bucks
4 more tubes of silicone: 30 bucks
Total cost so far: $1,410.00
Re: Mike's Low-Budget Home Observatory (WIP)
Posted: Tue Jul 13, 2021 11:44 am
by pakarinen
Looks good! Would a vent fan (or two?) in a sidewall be enough for temp control?
Re: Mike's Low-Budget Home Observatory (WIP)
Posted: Tue Jul 13, 2021 12:10 pm
by Graeme1858
Coming along nicely Mike.
Looking forward to seeing how the roof rolls.
Regards
Graeme
Re: Mike's Low-Budget Home Observatory (WIP)
Posted: Tue Jul 13, 2021 5:06 pm
by helicon
Lookin' good Mike. Pretty excited to see how it turns out.
Re: Mike's Low-Budget Home Observatory (WIP)
Posted: Tue Jul 13, 2021 8:50 pm
by chartram
pakarinen wrote: ↑Tue Jul 13, 2021 11:44 am
Looks good! Would a vent fan (or two?) in a sidewall be enough for temp control?
I wish fans would work, but don't think they will suffice in the heat of the day. Current outside temp is 86F and the temp inside the shed is about 125F. Resin really sucks up heat... It is going to need some kind of cooling system. Also, humidity here is a huge factor (Georgia) so some type of cooler/dehumidifier is a must.
