

1. Insulate the tube.
Turbulence inside the tube as a result of cooling down is a major problem in Maks. If you don't isolate you can count on severe inside seeing problems and a long cooling period. The key is to slow down the inside cooling proces. Light passes through a Maksutov tube three times and the first time right along the cold tube wall. If you insulate that wall most of your problems are over. All kind of isolation materials are allowed. No need to isolate the backside. You will be surprised by the calming effect it has on the image.
If your only goal is to see nice open clusters, you have already finished your upgrade.
This is the "naked" telescope. A Skywatcher 102 mm
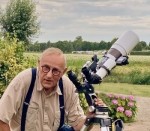
The same telescope with his jacket on.
2. Apply a matte-black tube inside the long baffle. The shininess of it is well known. It diminishes the contrast you see on the Moon or bright planets like Jupiter and adds to the glare around bright double stars. Just shove a well fitting tube of black flocking material up the baffle. Take care that it is not all the way in. Otherwise it will work as a diafragm and cover the light that comes from the edge of the mirror. This for instance, is a good material:
https://www.fpi-protostar.com/flock.htm
So you are finished now. Cooling time as well as contrast on Jupiter , double stars and Moon are optimized by now.
Maybe you would like to take two steps further and take away all shiny surfaces in the telescope within your power.
3. In order to do so you will have to unscrew the corrector and the mirror holder. Mark the position of the outside corrector holder and mirror holder with a small sticker. Cut it through and afterwards you will find the exact position back.
Yesterday evening I observed Jupiter with it. I was amazed by the amount of details I could see. It comes close to a 4 inch refractor. Of course I was helped by the good seeing.
Remember: steps one and two are the easiest ones with by far the most impact. The last ones will add the nearly unnoticeable last few percent.
The
Good luck and keep observing!