
Now that is seems impossible to get the right offset by adjusting the vanes, I guess I need to take the secondary mirror off the holder and "glue" it back in the correct place (with the offset). My problem is the direction. How do I get the major axle vertical and minor axle horizontal? It's so easy to get it rotated a bit, especially when my secondary cut is not that fine.
( viewtopic.php?f=4&t=12693 )
Advice on attaching the secondary mirror?
-
turboscrew

- Inter-Galactic Ambassador
- Articles: 0
- Posts: 3233
- Joined: Sat Jun 20, 2020 9:22 am
- 3
- Location: Nokia, Finland
- Status:
Offline
-
TSS Awards Badges
Advice on attaching the secondary mirror?
- Juha
Senior Embedded SW Designer
Telescope: OrionOptics XV12, Mount: CEM120, Tri-pier 360 and alternative dobson mount.
Grab 'n go: Omegon AC 102/660 on AZ-3 mount
Eyepieces: 26 mm Omegon SWAN 70°, 15 mm TV Plössl, 12.5 mm Baader Morpheus, 10 mm TV Delos, 6 mm Baader Classic Ortho, 5 mm TV DeLite, 4 mm and 3 mm TV Radians
Cameras: ZWO ASI 294MM Pro, Omegon veLOX 178C
OAG: TS-Optics TSOAG09, ZWO EFW 7 x 36 mm, ZWO filter sets: LRGB and Ha/OIII/SII
Explore Scientific HR 2" coma corrector, Meade x3 1.25" Barlow, TV PowerMate 4x 2"
Some filters (#80A, ND-96, ND-09, Astronomik UHC)
Laptop: Acer Enduro Urban N3 semi-rugged, Windows 11
LAT 61° 28' 10.9" N, Bortle 5
I don't suffer from insanity. I'm enjoying every minute of it.
-
NGC 1365

- Saturn Ambassador
- Articles: 0
- Posts: 368
- Joined: Mon Dec 02, 2019 8:30 am
- 4
- Location: NSW Australia
- Status:
Online
-
TSS Photo of the Day
TSS Awards Badges
Re: Advice on attaching the secondary mirror?
I'm not sure if this is what you are after, but this is how I installed my secondary to it's holder using silicone and builders plastic spacers.
.
And used this template to align it and to work out the offset.
- Attachments
-
Ivan
-
turboscrew
- Inter-Galactic Ambassador
- Articles: 0
- Posts: 3233
- Joined: Sat Jun 20, 2020 9:22 am
- 3
- Location: Nokia, Finland
- Status:
Offline
-
TSS Awards Badges
Re: Advice on attaching the secondary mirror?
Close. The offset in not really a problem, but the direction is. It's so easily that I could make the major axes of the holder and the mirror point some degrees in different direction.
I was thinking of printing a sablon - something like yours.
- Juha
Senior Embedded SW Designer
Telescope: OrionOptics XV12, Mount: CEM120, Tri-pier 360 and alternative dobson mount.
Grab 'n go: Omegon AC 102/660 on AZ-3 mount
Eyepieces: 26 mm Omegon SWAN 70°, 15 mm TV Plössl, 12.5 mm Baader Morpheus, 10 mm TV Delos, 6 mm Baader Classic Ortho, 5 mm TV DeLite, 4 mm and 3 mm TV Radians
Cameras: ZWO ASI 294MM Pro, Omegon veLOX 178C
OAG: TS-Optics TSOAG09, ZWO EFW 7 x 36 mm, ZWO filter sets: LRGB and Ha/OIII/SII
Explore Scientific HR 2" coma corrector, Meade x3 1.25" Barlow, TV PowerMate 4x 2"
Some filters (#80A, ND-96, ND-09, Astronomik UHC)
Laptop: Acer Enduro Urban N3 semi-rugged, Windows 11
LAT 61° 28' 10.9" N, Bortle 5
I don't suffer from insanity. I'm enjoying every minute of it.
-
NGC 1365
- Saturn Ambassador
- Articles: 0
- Posts: 368
- Joined: Mon Dec 02, 2019 8:30 am
- 4
- Location: NSW Australia
- Status:
Online
-
TSS Photo of the Day
TSS Awards Badges
Re: Advice on attaching the secondary mirror?
Away from the focuser and towards the mirror. Use the shims when gluing to the holder to keep both in the same plane. What is the focal ratio of your scope and what offset value did you calculate?
Ivan
-
turboscrew
- Inter-Galactic Ambassador
- Articles: 0
- Posts: 3233
- Joined: Sat Jun 20, 2020 9:22 am
- 3
- Location: Nokia, Finland
- Status:
Offline
-
TSS Awards Badges
Re: Advice on attaching the secondary mirror?
My tube is shown in my signature: 300mm / 1200 mm
I was thinking of a "guide" like this for making marks on the side of the secondary and the holder.
(Or maybe I'll make another one for the holder.)
The ends of the red line are drawn in 45° so that they fold nicely upwards (along the holder).
- Juha
Senior Embedded SW Designer
Telescope: OrionOptics XV12, Mount: CEM120, Tri-pier 360 and alternative dobson mount.
Grab 'n go: Omegon AC 102/660 on AZ-3 mount
Eyepieces: 26 mm Omegon SWAN 70°, 15 mm TV Plössl, 12.5 mm Baader Morpheus, 10 mm TV Delos, 6 mm Baader Classic Ortho, 5 mm TV DeLite, 4 mm and 3 mm TV Radians
Cameras: ZWO ASI 294MM Pro, Omegon veLOX 178C
OAG: TS-Optics TSOAG09, ZWO EFW 7 x 36 mm, ZWO filter sets: LRGB and Ha/OIII/SII
Explore Scientific HR 2" coma corrector, Meade x3 1.25" Barlow, TV PowerMate 4x 2"
Some filters (#80A, ND-96, ND-09, Astronomik UHC)
Laptop: Acer Enduro Urban N3 semi-rugged, Windows 11
LAT 61° 28' 10.9" N, Bortle 5
I don't suffer from insanity. I'm enjoying every minute of it.
Senior Embedded SW Designer
Telescope: OrionOptics XV12, Mount: CEM120, Tri-pier 360 and alternative dobson mount.
Grab 'n go: Omegon AC 102/660 on AZ-3 mount
Eyepieces: 26 mm Omegon SWAN 70°, 15 mm TV Plössl, 12.5 mm Baader Morpheus, 10 mm TV Delos, 6 mm Baader Classic Ortho, 5 mm TV DeLite, 4 mm and 3 mm TV Radians
Cameras: ZWO ASI 294MM Pro, Omegon veLOX 178C
OAG: TS-Optics TSOAG09, ZWO EFW 7 x 36 mm, ZWO filter sets: LRGB and Ha/OIII/SII
Explore Scientific HR 2" coma corrector, Meade x3 1.25" Barlow, TV PowerMate 4x 2"
Some filters (#80A, ND-96, ND-09, Astronomik UHC)
Laptop: Acer Enduro Urban N3 semi-rugged, Windows 11
LAT 61° 28' 10.9" N, Bortle 5
I don't suffer from insanity. I'm enjoying every minute of it.
-
NGC 1365
- Saturn Ambassador
- Articles: 0
- Posts: 368
- Joined: Mon Dec 02, 2019 8:30 am
- 4
- Location: NSW Australia
- Status:
Online
-
TSS Photo of the Day
TSS Awards Badges
Re: Advice on attaching the secondary mirror?
Are you centre marking your diagonal mirror? Makes it very easy to set the offset with a laser collimator. So your offset mark on the mirror will be 6.6mm from the geometric centre towards the focuser end of the diagonal mirror.
Ivan
-
turboscrew
- Inter-Galactic Ambassador
- Articles: 0
- Posts: 3233
- Joined: Sat Jun 20, 2020 9:22 am
- 3
- Location: Nokia, Finland
- Status:
Offline
-
TSS Awards Badges
Re: Advice on attaching the secondary mirror?
I'm not going to mark the secondary center. I think I'll just add the alignment lines on the sides of the secondary.
My spider vanes don't have enough play to make the offset by adjustment. There are 4 vanes and the front vanes make a 45 degree angle with the focuser. So the adjustment needs to be 6.6 mm, and the vanes are a bit too short.
- Juha
Senior Embedded SW Designer
Telescope: OrionOptics XV12, Mount: CEM120, Tri-pier 360 and alternative dobson mount.
Grab 'n go: Omegon AC 102/660 on AZ-3 mount
Eyepieces: 26 mm Omegon SWAN 70°, 15 mm TV Plössl, 12.5 mm Baader Morpheus, 10 mm TV Delos, 6 mm Baader Classic Ortho, 5 mm TV DeLite, 4 mm and 3 mm TV Radians
Cameras: ZWO ASI 294MM Pro, Omegon veLOX 178C
OAG: TS-Optics TSOAG09, ZWO EFW 7 x 36 mm, ZWO filter sets: LRGB and Ha/OIII/SII
Explore Scientific HR 2" coma corrector, Meade x3 1.25" Barlow, TV PowerMate 4x 2"
Some filters (#80A, ND-96, ND-09, Astronomik UHC)
Laptop: Acer Enduro Urban N3 semi-rugged, Windows 11
LAT 61° 28' 10.9" N, Bortle 5
I don't suffer from insanity. I'm enjoying every minute of it.
Senior Embedded SW Designer
Telescope: OrionOptics XV12, Mount: CEM120, Tri-pier 360 and alternative dobson mount.
Grab 'n go: Omegon AC 102/660 on AZ-3 mount
Eyepieces: 26 mm Omegon SWAN 70°, 15 mm TV Plössl, 12.5 mm Baader Morpheus, 10 mm TV Delos, 6 mm Baader Classic Ortho, 5 mm TV DeLite, 4 mm and 3 mm TV Radians
Cameras: ZWO ASI 294MM Pro, Omegon veLOX 178C
OAG: TS-Optics TSOAG09, ZWO EFW 7 x 36 mm, ZWO filter sets: LRGB and Ha/OIII/SII
Explore Scientific HR 2" coma corrector, Meade x3 1.25" Barlow, TV PowerMate 4x 2"
Some filters (#80A, ND-96, ND-09, Astronomik UHC)
Laptop: Acer Enduro Urban N3 semi-rugged, Windows 11
LAT 61° 28' 10.9" N, Bortle 5
I don't suffer from insanity. I'm enjoying every minute of it.
-
turboscrew
- Inter-Galactic Ambassador
- Articles: 0
- Posts: 3233
- Joined: Sat Jun 20, 2020 9:22 am
- 3
- Location: Nokia, Finland
- Status:
Offline
-
TSS Awards Badges
Re: Advice on attaching the secondary mirror?
And yes, I guess I understand the secondary offset. I did the math once, but have lost the paper. I did it again, and now with computer.
(I don't know why the drawing is shown so small.)
- Juha
Senior Embedded SW Designer
Telescope: OrionOptics XV12, Mount: CEM120, Tri-pier 360 and alternative dobson mount.
Grab 'n go: Omegon AC 102/660 on AZ-3 mount
Eyepieces: 26 mm Omegon SWAN 70°, 15 mm TV Plössl, 12.5 mm Baader Morpheus, 10 mm TV Delos, 6 mm Baader Classic Ortho, 5 mm TV DeLite, 4 mm and 3 mm TV Radians
Cameras: ZWO ASI 294MM Pro, Omegon veLOX 178C
OAG: TS-Optics TSOAG09, ZWO EFW 7 x 36 mm, ZWO filter sets: LRGB and Ha/OIII/SII
Explore Scientific HR 2" coma corrector, Meade x3 1.25" Barlow, TV PowerMate 4x 2"
Some filters (#80A, ND-96, ND-09, Astronomik UHC)
Laptop: Acer Enduro Urban N3 semi-rugged, Windows 11
LAT 61° 28' 10.9" N, Bortle 5
I don't suffer from insanity. I'm enjoying every minute of it.
Senior Embedded SW Designer
Telescope: OrionOptics XV12, Mount: CEM120, Tri-pier 360 and alternative dobson mount.
Grab 'n go: Omegon AC 102/660 on AZ-3 mount
Eyepieces: 26 mm Omegon SWAN 70°, 15 mm TV Plössl, 12.5 mm Baader Morpheus, 10 mm TV Delos, 6 mm Baader Classic Ortho, 5 mm TV DeLite, 4 mm and 3 mm TV Radians
Cameras: ZWO ASI 294MM Pro, Omegon veLOX 178C
OAG: TS-Optics TSOAG09, ZWO EFW 7 x 36 mm, ZWO filter sets: LRGB and Ha/OIII/SII
Explore Scientific HR 2" coma corrector, Meade x3 1.25" Barlow, TV PowerMate 4x 2"
Some filters (#80A, ND-96, ND-09, Astronomik UHC)
Laptop: Acer Enduro Urban N3 semi-rugged, Windows 11
LAT 61° 28' 10.9" N, Bortle 5
I don't suffer from insanity. I'm enjoying every minute of it.
-
NGC 1365
- Saturn Ambassador
- Articles: 0
- Posts: 368
- Joined: Mon Dec 02, 2019 8:30 am
- 4
- Location: NSW Australia
- Status:
Online
-
TSS Photo of the Day
TSS Awards Badges
Re: Advice on attaching the secondary mirror?
Your adjustment with the spider only needs to be 4.7mm and the secondary holder needs to be adjusted 4.7mm towards primary mirror. This is for a secondary that is fixed to your holder without offset.
Ivan
-
turboscrew
- Inter-Galactic Ambassador
- Articles: 0
- Posts: 3233
- Joined: Sat Jun 20, 2020 9:22 am
- 3
- Location: Nokia, Finland
- Status:
Offline
-
TSS Awards Badges
Re: Advice on attaching the secondary mirror?
Like I said, there is no vane directly towards focuser, but two vanes at + and - 45°. To get the holder to move 4.7 mm, the vanes in 45° needs to go back 6.6 mm. (6.6 mm x cos 45° = 4,667 mm, quite good enough, although the angle changes slightly as the vanes get longer)
Actually, I even tried, but the "front vanes" were so "at the edge" that I didn't have the nerve to leave it that way (less than 2mm thread inside the plastic adjustment nut).
- Juha
Senior Embedded SW Designer
Telescope: OrionOptics XV12, Mount: CEM120, Tri-pier 360 and alternative dobson mount.
Grab 'n go: Omegon AC 102/660 on AZ-3 mount
Eyepieces: 26 mm Omegon SWAN 70°, 15 mm TV Plössl, 12.5 mm Baader Morpheus, 10 mm TV Delos, 6 mm Baader Classic Ortho, 5 mm TV DeLite, 4 mm and 3 mm TV Radians
Cameras: ZWO ASI 294MM Pro, Omegon veLOX 178C
OAG: TS-Optics TSOAG09, ZWO EFW 7 x 36 mm, ZWO filter sets: LRGB and Ha/OIII/SII
Explore Scientific HR 2" coma corrector, Meade x3 1.25" Barlow, TV PowerMate 4x 2"
Some filters (#80A, ND-96, ND-09, Astronomik UHC)
Laptop: Acer Enduro Urban N3 semi-rugged, Windows 11
LAT 61° 28' 10.9" N, Bortle 5
I don't suffer from insanity. I'm enjoying every minute of it.
Senior Embedded SW Designer
Telescope: OrionOptics XV12, Mount: CEM120, Tri-pier 360 and alternative dobson mount.
Grab 'n go: Omegon AC 102/660 on AZ-3 mount
Eyepieces: 26 mm Omegon SWAN 70°, 15 mm TV Plössl, 12.5 mm Baader Morpheus, 10 mm TV Delos, 6 mm Baader Classic Ortho, 5 mm TV DeLite, 4 mm and 3 mm TV Radians
Cameras: ZWO ASI 294MM Pro, Omegon veLOX 178C
OAG: TS-Optics TSOAG09, ZWO EFW 7 x 36 mm, ZWO filter sets: LRGB and Ha/OIII/SII
Explore Scientific HR 2" coma corrector, Meade x3 1.25" Barlow, TV PowerMate 4x 2"
Some filters (#80A, ND-96, ND-09, Astronomik UHC)
Laptop: Acer Enduro Urban N3 semi-rugged, Windows 11
LAT 61° 28' 10.9" N, Bortle 5
I don't suffer from insanity. I'm enjoying every minute of it.
-
turboscrew
- Inter-Galactic Ambassador
- Articles: 0
- Posts: 3233
- Joined: Sat Jun 20, 2020 9:22 am
- 3
- Location: Nokia, Finland
- Status:
Offline
-
TSS Awards Badges
Re: Advice on attaching the secondary mirror?
BTW, @NGC 1365, how did you do the actual "gluing" (=siliconing)? Did you have a clamp to hold the mirror holder such that the mirror attachment surface was somewhat level? Or did you had the mirror face down and some support under the holder screw end?
- Juha
Senior Embedded SW Designer
Telescope: OrionOptics XV12, Mount: CEM120, Tri-pier 360 and alternative dobson mount.
Grab 'n go: Omegon AC 102/660 on AZ-3 mount
Eyepieces: 26 mm Omegon SWAN 70°, 15 mm TV Plössl, 12.5 mm Baader Morpheus, 10 mm TV Delos, 6 mm Baader Classic Ortho, 5 mm TV DeLite, 4 mm and 3 mm TV Radians
Cameras: ZWO ASI 294MM Pro, Omegon veLOX 178C
OAG: TS-Optics TSOAG09, ZWO EFW 7 x 36 mm, ZWO filter sets: LRGB and Ha/OIII/SII
Explore Scientific HR 2" coma corrector, Meade x3 1.25" Barlow, TV PowerMate 4x 2"
Some filters (#80A, ND-96, ND-09, Astronomik UHC)
Laptop: Acer Enduro Urban N3 semi-rugged, Windows 11
LAT 61° 28' 10.9" N, Bortle 5
I don't suffer from insanity. I'm enjoying every minute of it.
Senior Embedded SW Designer
Telescope: OrionOptics XV12, Mount: CEM120, Tri-pier 360 and alternative dobson mount.
Grab 'n go: Omegon AC 102/660 on AZ-3 mount
Eyepieces: 26 mm Omegon SWAN 70°, 15 mm TV Plössl, 12.5 mm Baader Morpheus, 10 mm TV Delos, 6 mm Baader Classic Ortho, 5 mm TV DeLite, 4 mm and 3 mm TV Radians
Cameras: ZWO ASI 294MM Pro, Omegon veLOX 178C
OAG: TS-Optics TSOAG09, ZWO EFW 7 x 36 mm, ZWO filter sets: LRGB and Ha/OIII/SII
Explore Scientific HR 2" coma corrector, Meade x3 1.25" Barlow, TV PowerMate 4x 2"
Some filters (#80A, ND-96, ND-09, Astronomik UHC)
Laptop: Acer Enduro Urban N3 semi-rugged, Windows 11
LAT 61° 28' 10.9" N, Bortle 5
I don't suffer from insanity. I'm enjoying every minute of it.
-
NGC 1365
- Saturn Ambassador
- Articles: 0
- Posts: 368
- Joined: Mon Dec 02, 2019 8:30 am
- 4
- Location: NSW Australia
- Status:
Online
-
TSS Photo of the Day
TSS Awards Badges
Re: Advice on attaching the secondary mirror?
I laid it face down on a few sheets of lens tissue and set up a few blocks of timber to place a little pressure on the top most part of the holder and left it for a few days. I recently replaced this holder and mirror with one that holds the mirror internally, so had to make the offset adjustment with the spider and lowering the holder. Sorry I missed your description of the vanes at 45 deg, you are correct about the 6.6mm movement of the vane were as I was talking about the hub movement away from focuser. Keep us posted with progress and pics.
Ivan
-
turboscrew
- Inter-Galactic Ambassador
- Articles: 0
- Posts: 3233
- Joined: Sat Jun 20, 2020 9:22 am
- 3
- Location: Nokia, Finland
- Status:
Offline
-
TSS Awards Badges
Re: Advice on attaching the secondary mirror?
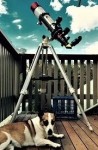
As you can see from the picture (haven't done anything to it yet), It's not very easy to get the secondary mirror aligned correctly on the holder. From the reflected image of the camera, you can see that the picture is taken in front of the mirror.
You can notice that the mirror surface is slightly skewed (rotated clockwise) compared to the back side. There is a noticeable angle between the major axis of the mirror surface and the major axis of the back side. Also the left side is perpendicular to the surface, but the right side is obviously not. The mirror surface itself seems to be ellipse with 75 mm minor axis and 106 mm major axis.
That's why some mask/shablon/template is needed.
- Juha
Senior Embedded SW Designer
Telescope: OrionOptics XV12, Mount: CEM120, Tri-pier 360 and alternative dobson mount.
Grab 'n go: Omegon AC 102/660 on AZ-3 mount
Eyepieces: 26 mm Omegon SWAN 70°, 15 mm TV Plössl, 12.5 mm Baader Morpheus, 10 mm TV Delos, 6 mm Baader Classic Ortho, 5 mm TV DeLite, 4 mm and 3 mm TV Radians
Cameras: ZWO ASI 294MM Pro, Omegon veLOX 178C
OAG: TS-Optics TSOAG09, ZWO EFW 7 x 36 mm, ZWO filter sets: LRGB and Ha/OIII/SII
Explore Scientific HR 2" coma corrector, Meade x3 1.25" Barlow, TV PowerMate 4x 2"
Some filters (#80A, ND-96, ND-09, Astronomik UHC)
Laptop: Acer Enduro Urban N3 semi-rugged, Windows 11
LAT 61° 28' 10.9" N, Bortle 5
I don't suffer from insanity. I'm enjoying every minute of it.
Senior Embedded SW Designer
Telescope: OrionOptics XV12, Mount: CEM120, Tri-pier 360 and alternative dobson mount.
Grab 'n go: Omegon AC 102/660 on AZ-3 mount
Eyepieces: 26 mm Omegon SWAN 70°, 15 mm TV Plössl, 12.5 mm Baader Morpheus, 10 mm TV Delos, 6 mm Baader Classic Ortho, 5 mm TV DeLite, 4 mm and 3 mm TV Radians
Cameras: ZWO ASI 294MM Pro, Omegon veLOX 178C
OAG: TS-Optics TSOAG09, ZWO EFW 7 x 36 mm, ZWO filter sets: LRGB and Ha/OIII/SII
Explore Scientific HR 2" coma corrector, Meade x3 1.25" Barlow, TV PowerMate 4x 2"
Some filters (#80A, ND-96, ND-09, Astronomik UHC)
Laptop: Acer Enduro Urban N3 semi-rugged, Windows 11
LAT 61° 28' 10.9" N, Bortle 5
I don't suffer from insanity. I'm enjoying every minute of it.
-
turboscrew
- Inter-Galactic Ambassador
- Articles: 0
- Posts: 3233
- Joined: Sat Jun 20, 2020 9:22 am
- 3
- Location: Nokia, Finland
- Status:
Offline
-
TSS Awards Badges
Re: Advice on attaching the secondary mirror?
The template taped onto the secondary.
That much skew - see the angle between the bolt and the major axis drawn on the template.
Just try collimating the secondary mirror... 
- Juha
Senior Embedded SW Designer
Telescope: OrionOptics XV12, Mount: CEM120, Tri-pier 360 and alternative dobson mount.
Grab 'n go: Omegon AC 102/660 on AZ-3 mount
Eyepieces: 26 mm Omegon SWAN 70°, 15 mm TV Plössl, 12.5 mm Baader Morpheus, 10 mm TV Delos, 6 mm Baader Classic Ortho, 5 mm TV DeLite, 4 mm and 3 mm TV Radians
Cameras: ZWO ASI 294MM Pro, Omegon veLOX 178C
OAG: TS-Optics TSOAG09, ZWO EFW 7 x 36 mm, ZWO filter sets: LRGB and Ha/OIII/SII
Explore Scientific HR 2" coma corrector, Meade x3 1.25" Barlow, TV PowerMate 4x 2"
Some filters (#80A, ND-96, ND-09, Astronomik UHC)
Laptop: Acer Enduro Urban N3 semi-rugged, Windows 11
LAT 61° 28' 10.9" N, Bortle 5
I don't suffer from insanity. I'm enjoying every minute of it.
Senior Embedded SW Designer
Telescope: OrionOptics XV12, Mount: CEM120, Tri-pier 360 and alternative dobson mount.
Grab 'n go: Omegon AC 102/660 on AZ-3 mount
Eyepieces: 26 mm Omegon SWAN 70°, 15 mm TV Plössl, 12.5 mm Baader Morpheus, 10 mm TV Delos, 6 mm Baader Classic Ortho, 5 mm TV DeLite, 4 mm and 3 mm TV Radians
Cameras: ZWO ASI 294MM Pro, Omegon veLOX 178C
OAG: TS-Optics TSOAG09, ZWO EFW 7 x 36 mm, ZWO filter sets: LRGB and Ha/OIII/SII
Explore Scientific HR 2" coma corrector, Meade x3 1.25" Barlow, TV PowerMate 4x 2"
Some filters (#80A, ND-96, ND-09, Astronomik UHC)
Laptop: Acer Enduro Urban N3 semi-rugged, Windows 11
LAT 61° 28' 10.9" N, Bortle 5
I don't suffer from insanity. I'm enjoying every minute of it.
-
turboscrew
- Inter-Galactic Ambassador
- Articles: 0
- Posts: 3233
- Joined: Sat Jun 20, 2020 9:22 am
- 3
- Location: Nokia, Finland
- Status:
Offline
-
TSS Awards Badges
Re: Advice on attaching the secondary mirror?
Now secondary offset marked on the sides of the secondary mirror. That's why the "wings" in the template.
The same needs to be to the secondary holder too, after the secondary is removed from the holder.
And yes, now the bolt points to the geometrical center of the mirror - there is no offset.
And yes, now the bolt points to the geometrical center of the mirror - there is no offset.
- Juha
Senior Embedded SW Designer
Telescope: OrionOptics XV12, Mount: CEM120, Tri-pier 360 and alternative dobson mount.
Grab 'n go: Omegon AC 102/660 on AZ-3 mount
Eyepieces: 26 mm Omegon SWAN 70°, 15 mm TV Plössl, 12.5 mm Baader Morpheus, 10 mm TV Delos, 6 mm Baader Classic Ortho, 5 mm TV DeLite, 4 mm and 3 mm TV Radians
Cameras: ZWO ASI 294MM Pro, Omegon veLOX 178C
OAG: TS-Optics TSOAG09, ZWO EFW 7 x 36 mm, ZWO filter sets: LRGB and Ha/OIII/SII
Explore Scientific HR 2" coma corrector, Meade x3 1.25" Barlow, TV PowerMate 4x 2"
Some filters (#80A, ND-96, ND-09, Astronomik UHC)
Laptop: Acer Enduro Urban N3 semi-rugged, Windows 11
LAT 61° 28' 10.9" N, Bortle 5
I don't suffer from insanity. I'm enjoying every minute of it.
Senior Embedded SW Designer
Telescope: OrionOptics XV12, Mount: CEM120, Tri-pier 360 and alternative dobson mount.
Grab 'n go: Omegon AC 102/660 on AZ-3 mount
Eyepieces: 26 mm Omegon SWAN 70°, 15 mm TV Plössl, 12.5 mm Baader Morpheus, 10 mm TV Delos, 6 mm Baader Classic Ortho, 5 mm TV DeLite, 4 mm and 3 mm TV Radians
Cameras: ZWO ASI 294MM Pro, Omegon veLOX 178C
OAG: TS-Optics TSOAG09, ZWO EFW 7 x 36 mm, ZWO filter sets: LRGB and Ha/OIII/SII
Explore Scientific HR 2" coma corrector, Meade x3 1.25" Barlow, TV PowerMate 4x 2"
Some filters (#80A, ND-96, ND-09, Astronomik UHC)
Laptop: Acer Enduro Urban N3 semi-rugged, Windows 11
LAT 61° 28' 10.9" N, Bortle 5
I don't suffer from insanity. I'm enjoying every minute of it.
-
turboscrew
- Inter-Galactic Ambassador
- Articles: 0
- Posts: 3233
- Joined: Sat Jun 20, 2020 9:22 am
- 3
- Location: Nokia, Finland
- Status:
Offline
-
TSS Awards Badges
Re: Advice on attaching the secondary mirror?
A-ha . Even the holder angle is not 45° but 43.5°. That means that the spacer at the low end needs to be 2 mm thicker than the spacer at the high end.
- Juha
Senior Embedded SW Designer
Telescope: OrionOptics XV12, Mount: CEM120, Tri-pier 360 and alternative dobson mount.
Grab 'n go: Omegon AC 102/660 on AZ-3 mount
Eyepieces: 26 mm Omegon SWAN 70°, 15 mm TV Plössl, 12.5 mm Baader Morpheus, 10 mm TV Delos, 6 mm Baader Classic Ortho, 5 mm TV DeLite, 4 mm and 3 mm TV Radians
Cameras: ZWO ASI 294MM Pro, Omegon veLOX 178C
OAG: TS-Optics TSOAG09, ZWO EFW 7 x 36 mm, ZWO filter sets: LRGB and Ha/OIII/SII
Explore Scientific HR 2" coma corrector, Meade x3 1.25" Barlow, TV PowerMate 4x 2"
Some filters (#80A, ND-96, ND-09, Astronomik UHC)
Laptop: Acer Enduro Urban N3 semi-rugged, Windows 11
LAT 61° 28' 10.9" N, Bortle 5
I don't suffer from insanity. I'm enjoying every minute of it.
Senior Embedded SW Designer
Telescope: OrionOptics XV12, Mount: CEM120, Tri-pier 360 and alternative dobson mount.
Grab 'n go: Omegon AC 102/660 on AZ-3 mount
Eyepieces: 26 mm Omegon SWAN 70°, 15 mm TV Plössl, 12.5 mm Baader Morpheus, 10 mm TV Delos, 6 mm Baader Classic Ortho, 5 mm TV DeLite, 4 mm and 3 mm TV Radians
Cameras: ZWO ASI 294MM Pro, Omegon veLOX 178C
OAG: TS-Optics TSOAG09, ZWO EFW 7 x 36 mm, ZWO filter sets: LRGB and Ha/OIII/SII
Explore Scientific HR 2" coma corrector, Meade x3 1.25" Barlow, TV PowerMate 4x 2"
Some filters (#80A, ND-96, ND-09, Astronomik UHC)
Laptop: Acer Enduro Urban N3 semi-rugged, Windows 11
LAT 61° 28' 10.9" N, Bortle 5
I don't suffer from insanity. I'm enjoying every minute of it.
-
turboscrew
- Inter-Galactic Ambassador
- Articles: 0
- Posts: 3233
- Joined: Sat Jun 20, 2020 9:22 am
- 3
- Location: Nokia, Finland
- Status:
Offline
-
TSS Awards Badges
Re: Advice on attaching the secondary mirror?
Quite a job getting the backside marked for gluing the secondary to the holder. The mirror's front side and back side are not really "perfectly symmetrical"
This is the picture from the back side with the markers. You can see the reflective coating through the glass - except in the upper part where there is that 45° slope outwards, and the reflective surface continues under it.
You can see the asymmetry of the glass - and the back side.
The red vertical line is the major axle of the reflecting face brought to the back side. The horizontal line is the offset-line = line parallel to minor axis but moved downwards by the amount of the offset. The upper short horizontal lines are markers for 4.5 mm thick nail (spacer). The other spacer is 2.5 mm thick nail at the edge of the lower end of the holder. That should fix the 43.5° holder angle (instead of the 45°).
The arcs of ellipse are the shape of the holder. Since the holder is hollow, I need to check that the silicon goes in places where there is holder.
The mirror is upside down in more ways than one: back-side up, and "vane side" down.
- Juha
Senior Embedded SW Designer
Telescope: OrionOptics XV12, Mount: CEM120, Tri-pier 360 and alternative dobson mount.
Grab 'n go: Omegon AC 102/660 on AZ-3 mount
Eyepieces: 26 mm Omegon SWAN 70°, 15 mm TV Plössl, 12.5 mm Baader Morpheus, 10 mm TV Delos, 6 mm Baader Classic Ortho, 5 mm TV DeLite, 4 mm and 3 mm TV Radians
Cameras: ZWO ASI 294MM Pro, Omegon veLOX 178C
OAG: TS-Optics TSOAG09, ZWO EFW 7 x 36 mm, ZWO filter sets: LRGB and Ha/OIII/SII
Explore Scientific HR 2" coma corrector, Meade x3 1.25" Barlow, TV PowerMate 4x 2"
Some filters (#80A, ND-96, ND-09, Astronomik UHC)
Laptop: Acer Enduro Urban N3 semi-rugged, Windows 11
LAT 61° 28' 10.9" N, Bortle 5
I don't suffer from insanity. I'm enjoying every minute of it.
Senior Embedded SW Designer
Telescope: OrionOptics XV12, Mount: CEM120, Tri-pier 360 and alternative dobson mount.
Grab 'n go: Omegon AC 102/660 on AZ-3 mount
Eyepieces: 26 mm Omegon SWAN 70°, 15 mm TV Plössl, 12.5 mm Baader Morpheus, 10 mm TV Delos, 6 mm Baader Classic Ortho, 5 mm TV DeLite, 4 mm and 3 mm TV Radians
Cameras: ZWO ASI 294MM Pro, Omegon veLOX 178C
OAG: TS-Optics TSOAG09, ZWO EFW 7 x 36 mm, ZWO filter sets: LRGB and Ha/OIII/SII
Explore Scientific HR 2" coma corrector, Meade x3 1.25" Barlow, TV PowerMate 4x 2"
Some filters (#80A, ND-96, ND-09, Astronomik UHC)
Laptop: Acer Enduro Urban N3 semi-rugged, Windows 11
LAT 61° 28' 10.9" N, Bortle 5
I don't suffer from insanity. I'm enjoying every minute of it.
-
turboscrew
- Inter-Galactic Ambassador
- Articles: 0
- Posts: 3233
- Joined: Sat Jun 20, 2020 9:22 am
- 3
- Location: Nokia, Finland
- Status:
Offline
-
TSS Awards Badges
Re: Advice on attaching the secondary mirror?
For the alignment marks on the holder I had to use pieces of tape. No pen is visible, because it's black.
- Juha
Senior Embedded SW Designer
Telescope: OrionOptics XV12, Mount: CEM120, Tri-pier 360 and alternative dobson mount.
Grab 'n go: Omegon AC 102/660 on AZ-3 mount
Eyepieces: 26 mm Omegon SWAN 70°, 15 mm TV Plössl, 12.5 mm Baader Morpheus, 10 mm TV Delos, 6 mm Baader Classic Ortho, 5 mm TV DeLite, 4 mm and 3 mm TV Radians
Cameras: ZWO ASI 294MM Pro, Omegon veLOX 178C
OAG: TS-Optics TSOAG09, ZWO EFW 7 x 36 mm, ZWO filter sets: LRGB and Ha/OIII/SII
Explore Scientific HR 2" coma corrector, Meade x3 1.25" Barlow, TV PowerMate 4x 2"
Some filters (#80A, ND-96, ND-09, Astronomik UHC)
Laptop: Acer Enduro Urban N3 semi-rugged, Windows 11
LAT 61° 28' 10.9" N, Bortle 5
I don't suffer from insanity. I'm enjoying every minute of it.
Senior Embedded SW Designer
Telescope: OrionOptics XV12, Mount: CEM120, Tri-pier 360 and alternative dobson mount.
Grab 'n go: Omegon AC 102/660 on AZ-3 mount
Eyepieces: 26 mm Omegon SWAN 70°, 15 mm TV Plössl, 12.5 mm Baader Morpheus, 10 mm TV Delos, 6 mm Baader Classic Ortho, 5 mm TV DeLite, 4 mm and 3 mm TV Radians
Cameras: ZWO ASI 294MM Pro, Omegon veLOX 178C
OAG: TS-Optics TSOAG09, ZWO EFW 7 x 36 mm, ZWO filter sets: LRGB and Ha/OIII/SII
Explore Scientific HR 2" coma corrector, Meade x3 1.25" Barlow, TV PowerMate 4x 2"
Some filters (#80A, ND-96, ND-09, Astronomik UHC)
Laptop: Acer Enduro Urban N3 semi-rugged, Windows 11
LAT 61° 28' 10.9" N, Bortle 5
I don't suffer from insanity. I'm enjoying every minute of it.
-
turboscrew
- Inter-Galactic Ambassador
- Articles: 0
- Posts: 3233
- Joined: Sat Jun 20, 2020 9:22 am
- 3
- Location: Nokia, Finland
- Status:
Offline
-
TSS Awards Badges
Re: Advice on attaching the secondary mirror?
Here's the secondary waiting for the silicone to dry.
- Juha
Senior Embedded SW Designer
Telescope: OrionOptics XV12, Mount: CEM120, Tri-pier 360 and alternative dobson mount.
Grab 'n go: Omegon AC 102/660 on AZ-3 mount
Eyepieces: 26 mm Omegon SWAN 70°, 15 mm TV Plössl, 12.5 mm Baader Morpheus, 10 mm TV Delos, 6 mm Baader Classic Ortho, 5 mm TV DeLite, 4 mm and 3 mm TV Radians
Cameras: ZWO ASI 294MM Pro, Omegon veLOX 178C
OAG: TS-Optics TSOAG09, ZWO EFW 7 x 36 mm, ZWO filter sets: LRGB and Ha/OIII/SII
Explore Scientific HR 2" coma corrector, Meade x3 1.25" Barlow, TV PowerMate 4x 2"
Some filters (#80A, ND-96, ND-09, Astronomik UHC)
Laptop: Acer Enduro Urban N3 semi-rugged, Windows 11
LAT 61° 28' 10.9" N, Bortle 5
I don't suffer from insanity. I'm enjoying every minute of it.
Senior Embedded SW Designer
Telescope: OrionOptics XV12, Mount: CEM120, Tri-pier 360 and alternative dobson mount.
Grab 'n go: Omegon AC 102/660 on AZ-3 mount
Eyepieces: 26 mm Omegon SWAN 70°, 15 mm TV Plössl, 12.5 mm Baader Morpheus, 10 mm TV Delos, 6 mm Baader Classic Ortho, 5 mm TV DeLite, 4 mm and 3 mm TV Radians
Cameras: ZWO ASI 294MM Pro, Omegon veLOX 178C
OAG: TS-Optics TSOAG09, ZWO EFW 7 x 36 mm, ZWO filter sets: LRGB and Ha/OIII/SII
Explore Scientific HR 2" coma corrector, Meade x3 1.25" Barlow, TV PowerMate 4x 2"
Some filters (#80A, ND-96, ND-09, Astronomik UHC)
Laptop: Acer Enduro Urban N3 semi-rugged, Windows 11
LAT 61° 28' 10.9" N, Bortle 5
I don't suffer from insanity. I'm enjoying every minute of it.
-
turboscrew
- Inter-Galactic Ambassador
- Articles: 0
- Posts: 3233
- Joined: Sat Jun 20, 2020 9:22 am
- 3
- Location: Nokia, Finland
- Status:
Offline
-
TSS Awards Badges
Re: Advice on attaching the secondary mirror?
DARN! I was wrong. The holder is (overall) 45°. It's just not even, because it's just a tube cut in angle. I must have checked at a bad location. I have to re-glue the secondary (not enough adjustment play). Have to tape-mark the holder first.
- Juha
Senior Embedded SW Designer
Telescope: OrionOptics XV12, Mount: CEM120, Tri-pier 360 and alternative dobson mount.
Grab 'n go: Omegon AC 102/660 on AZ-3 mount
Eyepieces: 26 mm Omegon SWAN 70°, 15 mm TV Plössl, 12.5 mm Baader Morpheus, 10 mm TV Delos, 6 mm Baader Classic Ortho, 5 mm TV DeLite, 4 mm and 3 mm TV Radians
Cameras: ZWO ASI 294MM Pro, Omegon veLOX 178C
OAG: TS-Optics TSOAG09, ZWO EFW 7 x 36 mm, ZWO filter sets: LRGB and Ha/OIII/SII
Explore Scientific HR 2" coma corrector, Meade x3 1.25" Barlow, TV PowerMate 4x 2"
Some filters (#80A, ND-96, ND-09, Astronomik UHC)
Laptop: Acer Enduro Urban N3 semi-rugged, Windows 11
LAT 61° 28' 10.9" N, Bortle 5
I don't suffer from insanity. I'm enjoying every minute of it.
Senior Embedded SW Designer
Telescope: OrionOptics XV12, Mount: CEM120, Tri-pier 360 and alternative dobson mount.
Grab 'n go: Omegon AC 102/660 on AZ-3 mount
Eyepieces: 26 mm Omegon SWAN 70°, 15 mm TV Plössl, 12.5 mm Baader Morpheus, 10 mm TV Delos, 6 mm Baader Classic Ortho, 5 mm TV DeLite, 4 mm and 3 mm TV Radians
Cameras: ZWO ASI 294MM Pro, Omegon veLOX 178C
OAG: TS-Optics TSOAG09, ZWO EFW 7 x 36 mm, ZWO filter sets: LRGB and Ha/OIII/SII
Explore Scientific HR 2" coma corrector, Meade x3 1.25" Barlow, TV PowerMate 4x 2"
Some filters (#80A, ND-96, ND-09, Astronomik UHC)
Laptop: Acer Enduro Urban N3 semi-rugged, Windows 11
LAT 61° 28' 10.9" N, Bortle 5
I don't suffer from insanity. I'm enjoying every minute of it.
Create an account or sign in to join the discussion
You need to be a member in order to post a reply
Create an account
Not a member? register to join our community
Members can start their own topics & subscribe to topics
It’s free and only takes a minute